First, I built the frame...I made this frame 36x48 - I used some 1/2" lath, mitred the corners, fit them together, glued the joints and then stapled it all together.

Since my table cloth was round, I cut it into a rectangle (so that I wouldn't have as much excess on the back) and laid my frame on top of it. Given that the fabric was white, I was easily able to see the pattern through the wrong side, making it easy to line up the frame exactly where I wanted it placed on the fabric.
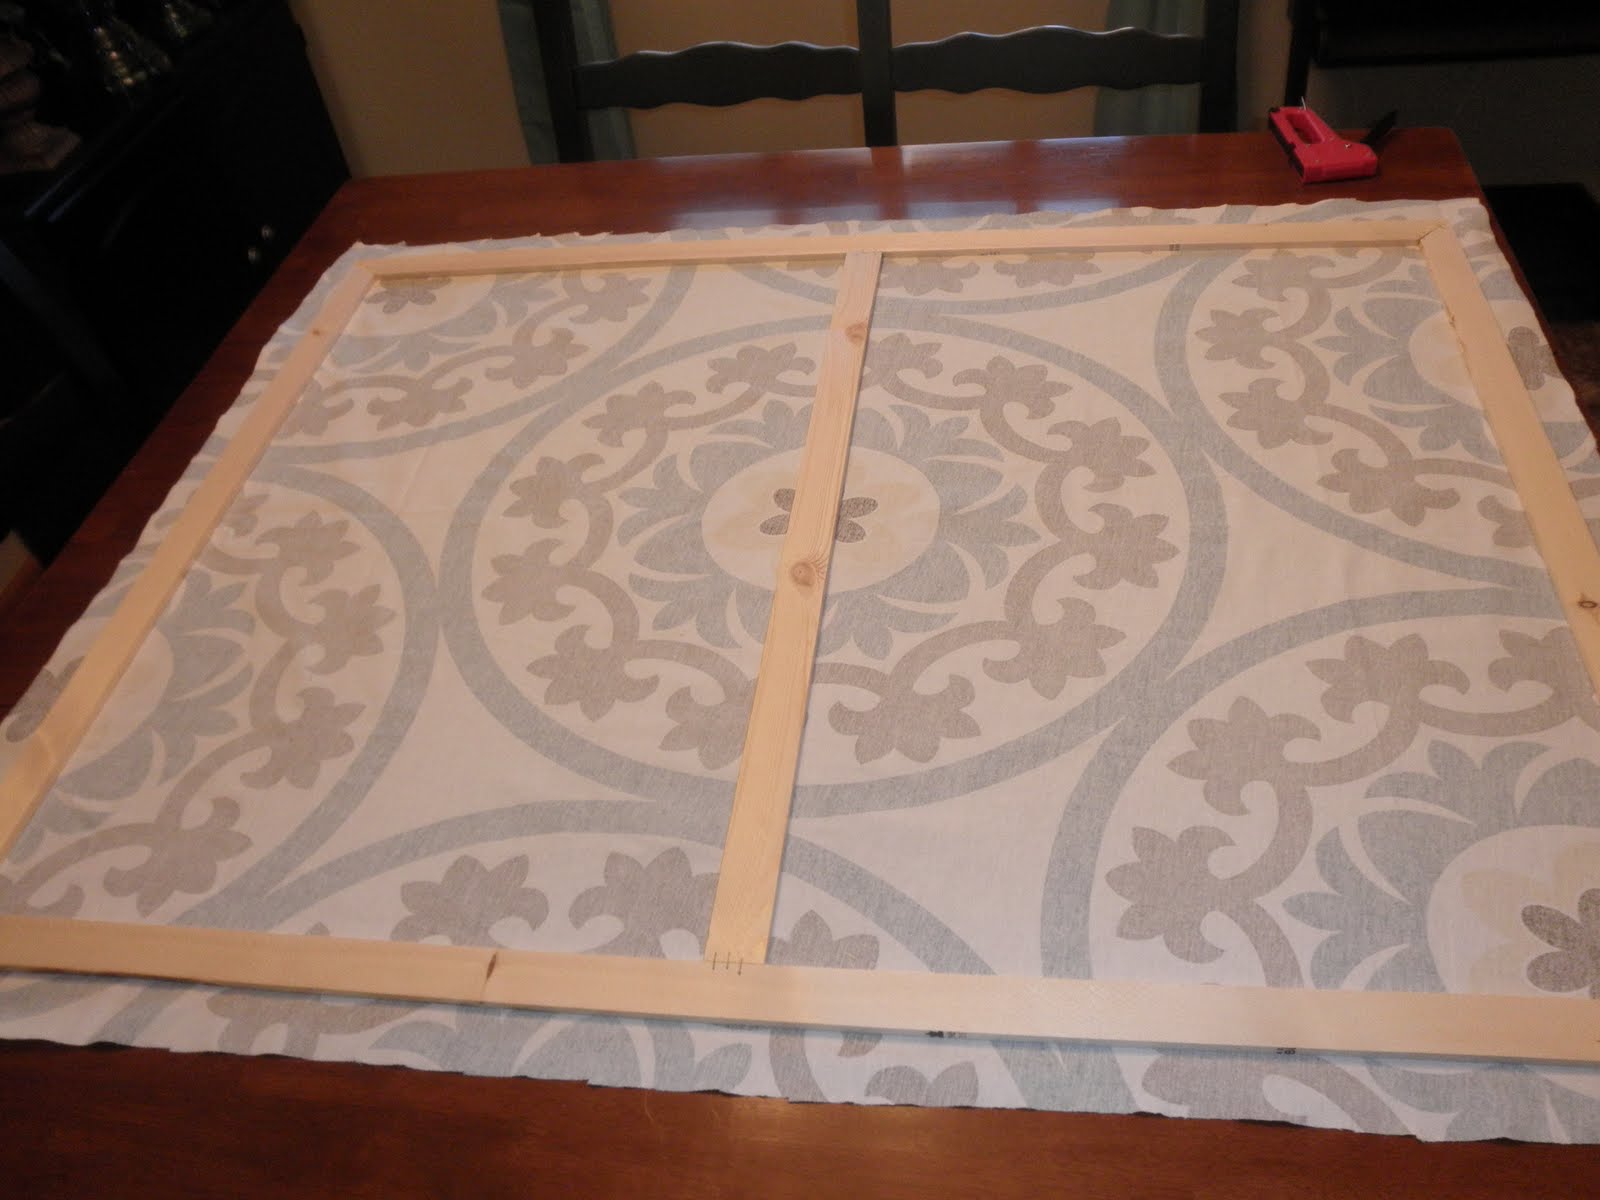
Then I started stapling. I worked at one end, making sure it was stapled tightly before moving to the other end and stretching the fabric as tightly as I could without making wrinkles. I did the same thing on the other two sides. Then I put up some nails using my handy laser level and hung it up on the wall. It is so light that I there was no need for hangers on the back of the frame...the frame itself sits on top of the nails in the wall.
I think it is beautiful! It really made my dining room pop!

It was only after hanging this fun piece on the wall, did I actually look around my dining room. It really wasn't working for me. Brooke had told me that she thought my ladder shelves needed to anchor the window, but I was adamant that I couldn't fit the china hutch in the room (due to a light switch) if the shelves were both on the window wall. So I had the disjunctive look of one shelf on the wall, one by the window, the china hutch jammed in the corner and my big square table taking up all the rest of the space. I knew it was time for a change. So, I took the leaf out of the table, reducing the size by about 20 inches. I don't use it often enough that putting the leaf in will be any great chore. Then I moved the china hutch out of its corner and moved the other ladder shelf to the window wall. Brooke was right...they needed to be together. But WHAT was I going to do with my china hutch? It was just too tall to sit on the one wall. Hmmmm...so I took it apart. I used the lower buffet part to anchor the wall with the new canvas and used the hutch as a shelf on the other wall...which was a last minute decision and is not shown in the picture below. I cannot believe how much it opened up the room and gave it a modern and classy feel!

Thanks for checking me out!
So pretty! And I love that you were thrifty and built your own canvas frame! well done!
ReplyDeleteFollowed your link from Just A Girl - love this! Probably because I did the same thing in my dining room :) I loved the print of this tablecloth so much and wanted to use it for wall art. I also built frames for it (using yardsticks - hey, they were cheap!) and made three separate pieces. Fun to see that someone else did the same!
ReplyDeleteCute cute cute!
ReplyDeleteI love this piece too! Wall art is sooo expensive, I'm very intersted in trying something like this.
ReplyDelete(found your link from just a girl!)
i love that. i hope that tablecloth is still available!
ReplyDeleteBeautiful! I love that you used a table cloth!! found you through JaG's show and share
ReplyDeleteThanks ladies! It was a fun, quick project...and it only cost me $9.78! So glad you found me on show and share...but as a new blogger I am having trouble linking from my site! As you can see, there is no link! Help!?
ReplyDeleteWow, what a great idea! I love it. It looks fantastic in your dining roo.
ReplyDeleteThis looks great!!! You are so talented!!
ReplyDeleteI can't figure out what I love the most--how inexpensive it is, how gorgeous the fabric is, or how awesome it looks on the wall! Nice!
ReplyDeleteLooks great, and I love your chair makeovers! I wanted to let you know I nominated you for the stylish Blogger Award, http://blackcabdesigns.blogspot.com/2011/02/stylish-blogger-award.html!
ReplyDeleteI love love love that new wall art you made! I am a sucker for patterned prints. :-) Great ideas with the furniture moving too, love that you thought of breaking the hutch into two pieces.
ReplyDelete