Monday, January 24, 2011

Another Chair Makeover!!

Okay - so I am really excited to share this chair makeover for a couple of reason...1. I didn't think I could do it and 2. I picked this little sucker up for $3! Here she is in almost all of her original glory ( I told you I am not used to taking pictures at each step - I get too excited!)...she had a cushion and the trim was attached prior to taking this picture!

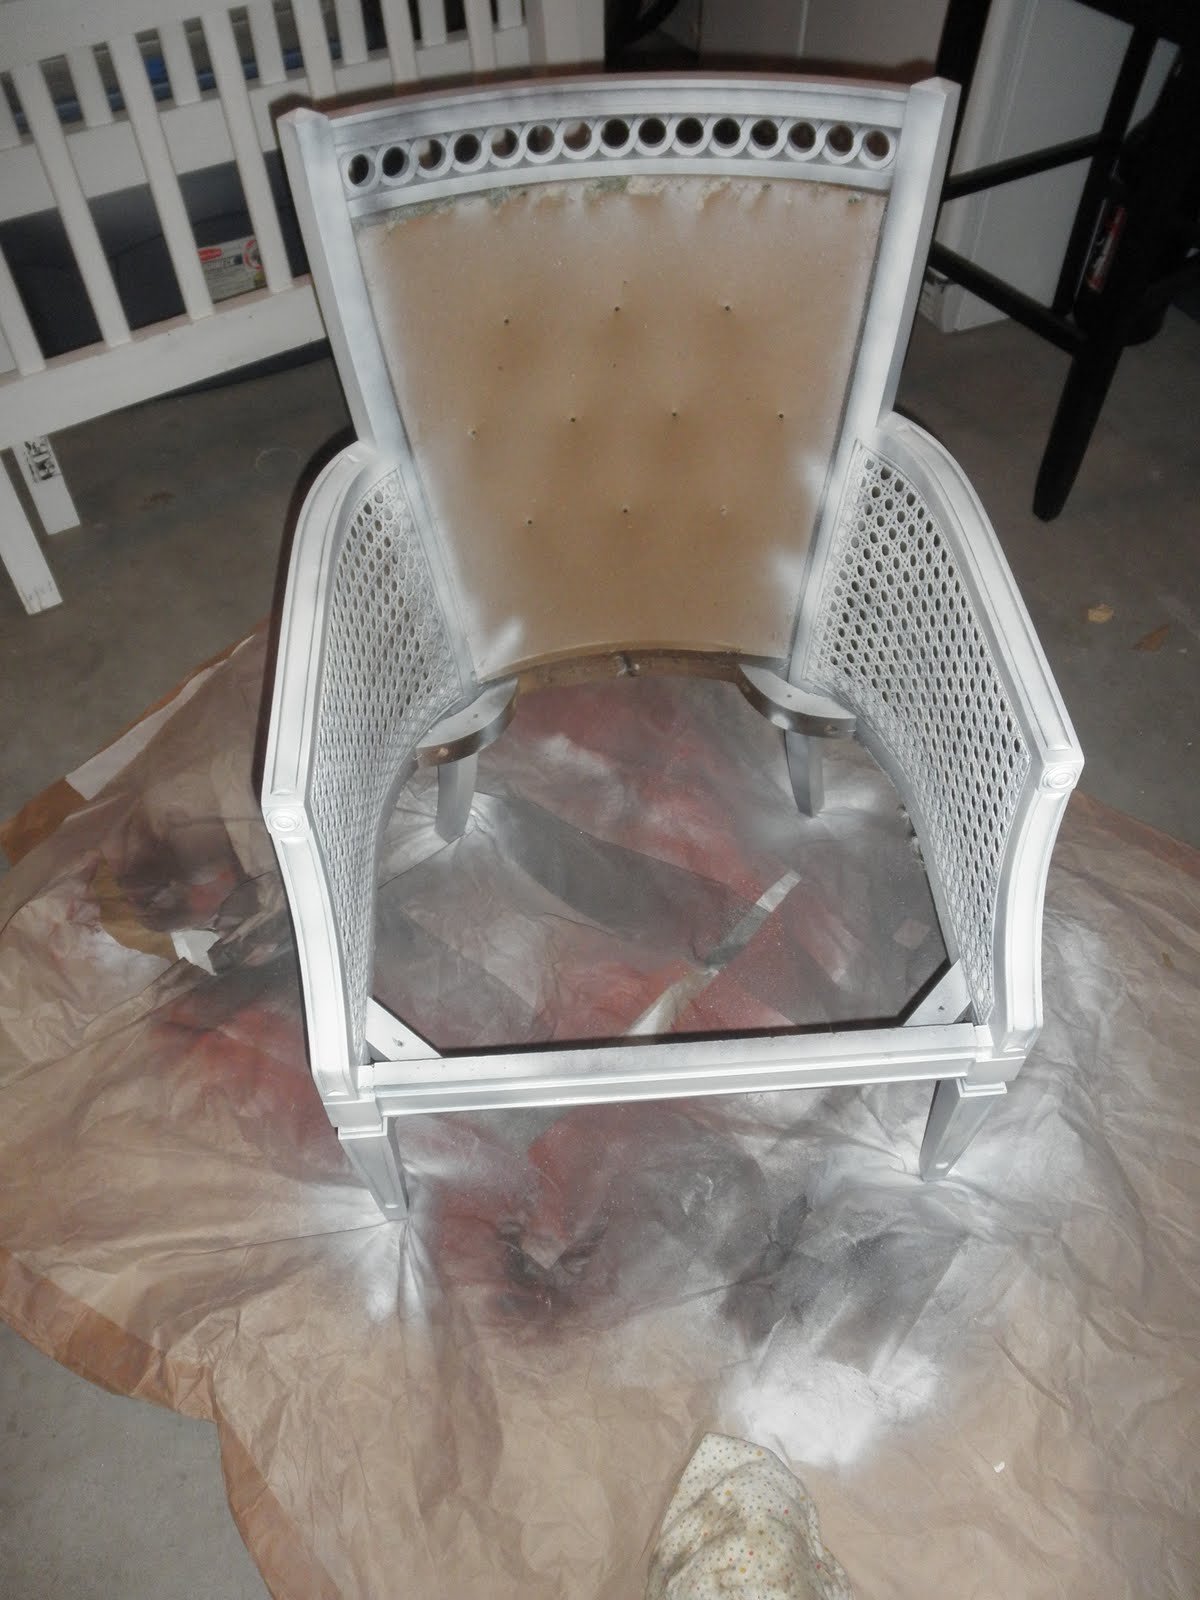
So with the assistance of my dear friend, Nikki, we stripped her down to her frame...the chair, not Nikki :)...which took about FOREVER...this little baby was a well made piece! I bet I pulled 500 staples out of her!

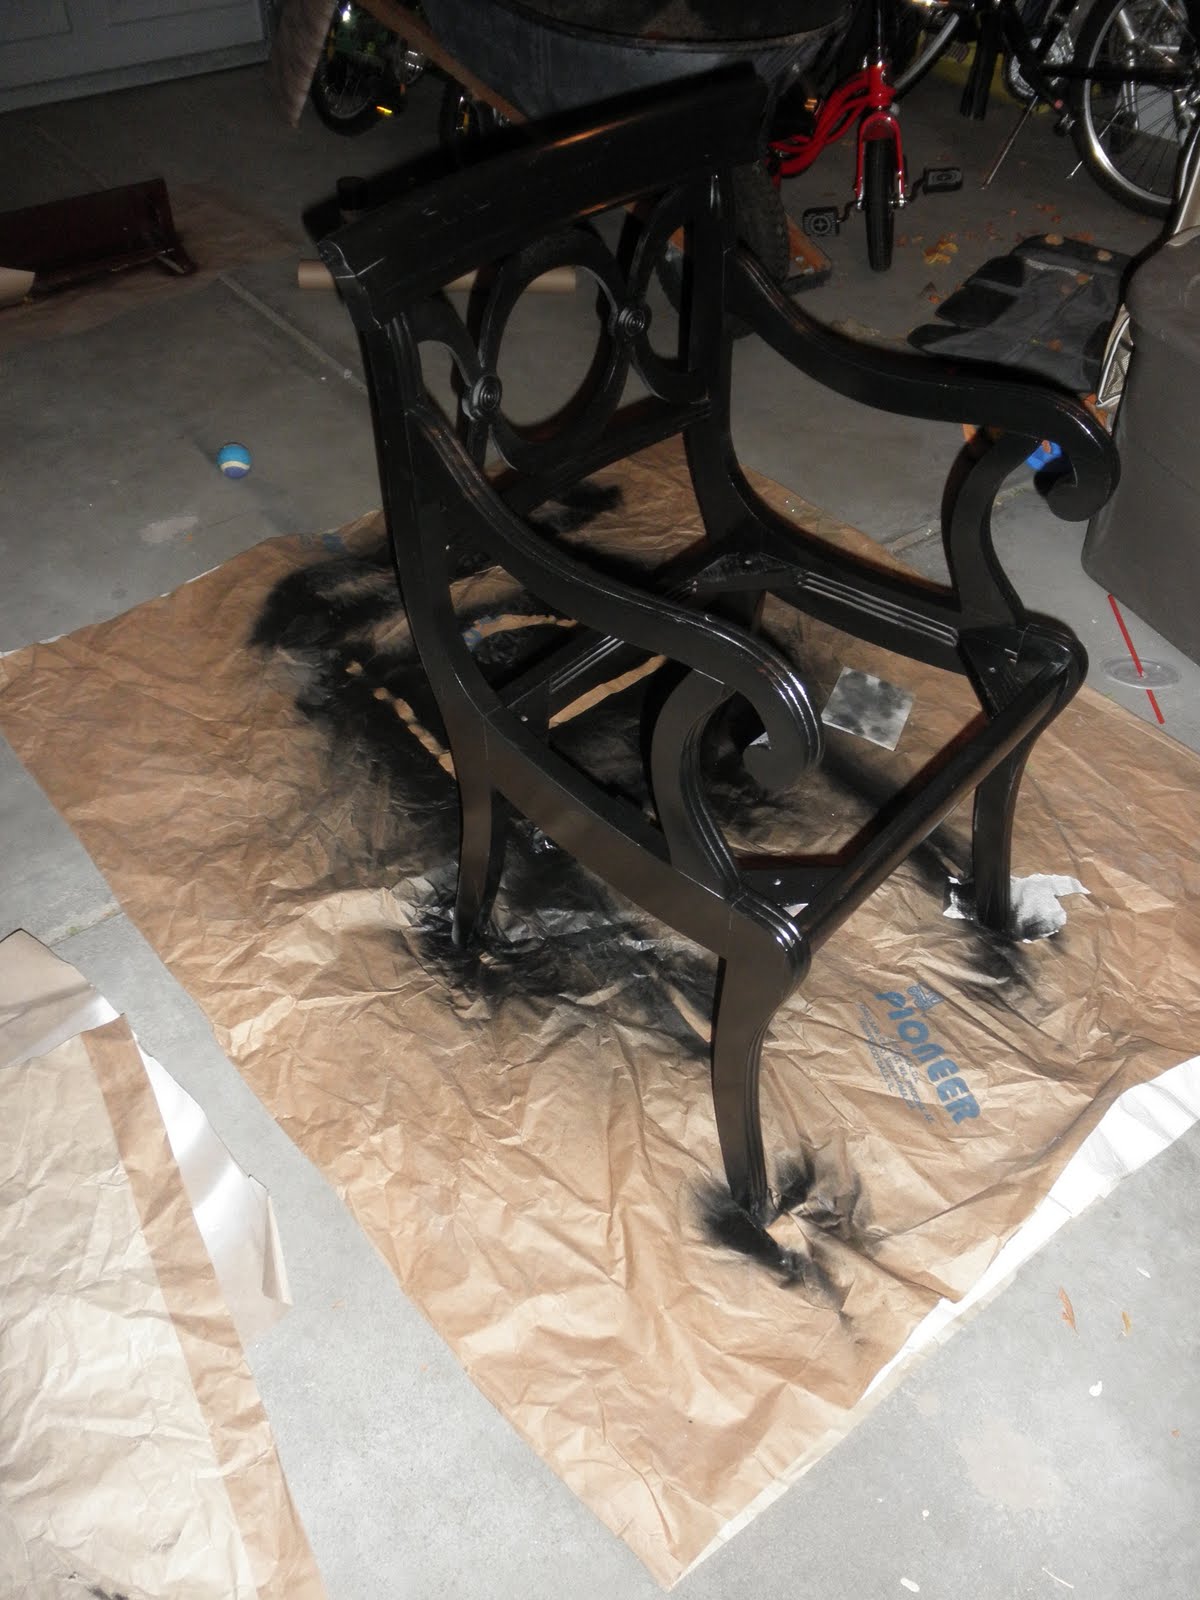
Then I took her into the garage and gave her a good cleaning, a coat of primer and two coats of paint - Rustoleum in Heirloom White - which is just the perfect off white.

As you can see from her before picture, she had a tufted back, which I have never attempted to do before and which two of my friends attempted to talk me out of trying, but I was determined to give this little gal something of her past to hold onto...err....I just really wanted to tuft it! So I did...which was a little harder than I thought. I ended up having to reuse the covered buttons that held the tufting in the original piece, because they had the sturdiest, best, prong back fasteners that I have ever seen...and I couldn't find them anywhere to buy...ugh. So what I did was use the old (ugly) button fasteners to tuft through the foam and batting...

And then I attached my super cute brown covered buttons to the fabric and pulled my thread through to the back and tied it off to the prong fasteners! Professional? Heck no! Functional? Heck Yes!
So, after I got all the tufting done, I started stapling the fabric back into the frame and when I had it tight and pretty much how I wanted it, I started stapling the trim into the frame. I will admit that I bought the wrong trim. I bought the kind that is supposed to be sewn under the fabric instead of just the rope trim...so after I had the edge stapled into the frame, I went back and glued the trim down onto its edge, so that it would be tight. It still looks great - just cost me an extra step. I didn't take a picture of this...sorry!

So here she is...in her revamped glory...love it and can't wait to get her mate done so that my living room can stop looking like a workshop!!

Sunday, January 9, 2011

Chair Redo

So, as you may know my handsome husband is deployed to Afghanistan right now, which really is nothing new, but it is the first time I have ever been a stay at home mom (not by choice) while he is gone. I am going CRAZY! It's not that I don't love being able to spend time with my boys, but I am a WORKER. I thrive on being insanely busy - which is what life with a full time job, two little boys and a deployed husband makes you. And crazy. :) So anyway - on this deployment I decided I need a new hobby. I thought that thrifting and redo-ing furniture for our new home sounded like just the thing for me. I had been searching for furniture for our guest room - I just wasn't into spending a ton of cash on furniture that 1. didn't really like and 2. was just like what everyone else had. So I talked with my dear friend, Brooke, who is a Home Refiner and told her what I was looking for and what I wanted to do. All I can tell you, thus far, is that I furnished my guest room (not including the mattress and box spring) for $29. Yep. TWENTY NINE DOLLARS!! I was almost doing cartwheels after shopping for a couple hours with Brooke! Of course, it means a lot of time - but time is all I've got until summer! The best part (as you will soon see) is that all of these projects help to make the new house OURS! Can't wait to get them all blogged!!

So this little gem was purchased at the Arc for a bargain basement price of...$4.99!!! I admit I had already done some sanding when I took this first picture - I am a little impatient and not used to documenting each step of my activity!!

So I took her apart, removed the hideous vinyl cushion,sanded her completely down, filled in a few cracks with my trusty wood filler and primed her. I used a spray primer - I believe it was a Valspar spray primer, in white, obviously.

I let the primer dry for several hours and then was ready to paint. This is also spray painted, with Rustoleum's High Gloss Black.
I had found the perfect bedding for my guest room at TJ Maxx (my FAVORITE store!) - it's a beautiful soft gray with ruffles by Cynthia Rowley - LOVE IT! But, it is pretty neutral, so I knew I had to do something with a little bit of pop for the cushion. I happened to be in Hobby Lobby (shocker) and found a super cute - very retro, but modern fabric that I thought would be perfect. I love how this chair came out!!

Monday, January 3, 2011

Fireplace...

When I first moved into my new house, I was really excited because I thought everything was a very neutral off white-ish color...boy was I wrong. Sure, it was off white TINTED WITH PEACH! UGGGHHHHH...Hideous is the only word I can describe it with. I don't know how I missed that. Maybe because EVERY PAINTED SURFACE in the entire house was the same...thus, making me feel comfortable. But, once I got my stuff in, I KNEW the paint had to go. And fast. So WE painted...a nice warm, cafe au lait...that looked...PEACHY!! So, I (not we, this time!) painted again. Finally. Sigh. Relief. Happiness. Then I started in the trim, sills, etc. to make them fresh and clean. One room at a time, I am gettin' it done. But, there was that pesky fireplace...with its peach tile and brassy finish. Yuck. Somehow, 3 days before the husband took off for Afghanistan, I convinced him it was a good idea to do a little fireplace makeover.

This picture doesn't quite do it justice, though, because it already has the brassy nastiness off and the surround as been painted white to freshen the varnish-y oak that was there.

So, we smashed out the old tile...

Replaced it with some great, tiny, tiles that were different shades of cream and brown...

Cleaned the old brass with rubbing alcohol and finished it with a high heat spray paint and TA DA!!! New fireplace and very happy wife!

All in all it cost us $68 and about 5 hours of total labor!

A Look Back...


As we start 2011, I decided to say a firm goodbye to 2010 (not my best year...) but trying to find some of the GREAT things about it...um...can't come up with a whole lot! Not going to lie, 2010 was TOUGH on this girl! It started right away with saying goodbye to my hubby - after only 6 weeks of being together at the end of 2009. Ugh. He moved to Cheyenne in January - leaving the kiddos, dogs and I behind to get through the school year and get the house sold. Fast forward to June - school is out and the house is STILL not sold - WHAT DO WE DO NOW??? Well, we decided to suck it up, take the big plunge and MOVE! So we did...got a new house and left the old one behind with the old life. :(

The day after the movers finished packing up the old house, I got a phone call from my sister who informed me that my mom was very sick. So, I headed to Wyoming to meet up with my husband, closed on the new house, moved the boxes into said house, slept (very little) and headed across the country to NY to help my family. After being in NY for a month - I HAD to get back to Wyoming to start my new life. The day after I got home, my husband headed out for 2 months for training/schooling/BS... whatever you want to call it. So, the boys and I did our best to settle in and get acquainted with a new city. My dear husband got back from his training and I made the mistake of taking a little sigh of relief. Silly girl...I should have known better!! We no sooner got his bags unpacked when he got a call for a short tasking deployment leaving in...TWO WEEKS!! That's right...headed to Afghanistan until June-ish. I swear I live my life in "ish's". But, I am nothing if not resilient. We just have to deal with these things and do our best to take them in stride. So, I ended my 2010 celebrating to the best of my ability with my kids...it wasn't the first time, and I am positive it won't be the last. But hey, looking back at some of these pictures, it looks like we created a few special memories even through all the pain.